This tutorial is me sharing some of the observations I made over the 3 years I spent making Unpacking. I was required to be able to make just about any shape you can imagine and accurately rotate it in any direction in isometric space. All by hand.
The skills I developed to do this revolve around measuring so bust out your ruler and protractor (or a copy of Aseprite) and follow along!

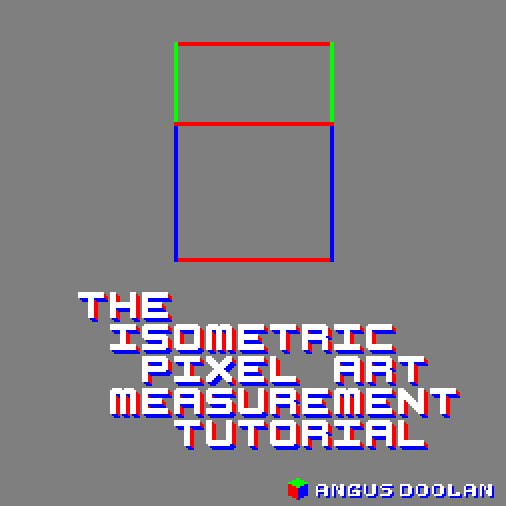
The fundamental rule we’re going to lay down for isometric pixel art is that the z axis points directly up and is always a straight line. The x and y axis point out at an angle (26.565°) that gives us this clean 2:1 pixel line.

The very first thing to understand is how to find an equal length on the x, y, and z axis. The easiest way to visualise this is of course a cube so let’s start there.

Decide the base scale with a square on the ground plane. I’m using a large square here to make it easy to see. You can use any size, however the smaller you go the less accurate measurements will be and the more you’ll have to rely on artistic intuition.

The x, and y axis are identical, just flipped, so to draw a square on the ground plane just make sure each side is the same length. In Aseprite you can hold shift while using the line tool to draw a 2:1 line

Then to find the height that is equal, draw a line directly upwards from the centre. And then draw a line at a 60° angle from the left hand corner. In Aseprite while using the line tool you can find the angle in the bottom left corner.

Where these two lines intersect is your height. Simply draw a square the same size as your ground square at that height and you have a cube.

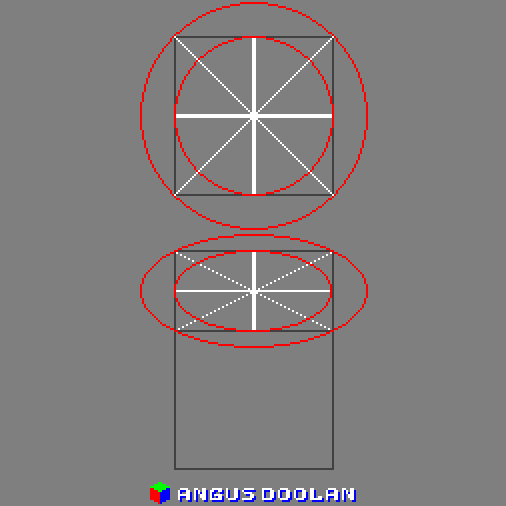
Now that you have a cube you know what a square looks like on the x, y, and z axis. Knowing that, you can apply everything you know about measuring normal squares to measuring isometric squares. For example you could find the centre of a plane by drawing a cross through it.

Or find the halfway point by drawing a straight line from that centre.

With that you can figure out how to draw a rectangular prism with the correct lengths on each of those axes. Or easily draw slopes. Simply find the points in space that you need and connect them up.

How about something round? This is where I’ll be sharing some tricks I use, they’re not always perfect but they will get you 95% of the way there without much trouble.

The easiest plane to draw a circle on is the ground. Simply draw an ellipse that is twice as wide as it is high, if it fits into your square you know it has the same diameter as your square's width.

To draw a circle on a side plane I will share a technique I came up with. First measure the desired width of the circle. Multiply that number by 1.4, this gives you the height. Then divide the width by 1.6 (or multiply by 0.625, whatever makes more sense to you.)

Draw an ellipse with these dimensions and rotate it by around 26.565 degrees, and you’ll get a perspective circle just about the right size. In Aseprite use the ellipse tool, pull it out to the correct length and width then continue holding and press alt to rotate.

Now that you can draw a circle you have another tool to do some useful measurements. You can find the distance from a point at any angle. For example, since the diameter is the same at any point around the circle you could draw your cube front on, in isometric!

A sphere is a perfect circle in isometric so if you want a sphere with the same diameter as your cube just make a circle with the same diameter as your ground plane ellipse.

You can even subdivide it using the circles you drew for the cube! That is also useful for figuring out where the top and bottom of your sphere is to place it on the ground.

If you’ve been keeping up so far you can probably figure out how to draw a whole range of shapes and orientations with a bit of problem solving. If you can break down what you need to draw into those shapes you should be able to have an accurate starting point for your piece.

How about a really odd shape? Or something that’s not facing on one of the 3 main axes at all? Here’s a trick I developed which requires a skew tool to pull off. I use GraphicsGale for this but there is a skew tool upcoming in Aseprite.

What we’re relying on is the fact that we know what a square looks like from front on, and we know how to draw a square in isometric projection. So if we can just get a flat image onto an isometric plane we can figure out where any point on that image will be in isometric space.

To convert our desired vertical plane to a straight-on square we can simply take the height of the plane we want and then create a square from it.

To change it back: 1) Draw your image on the square 2) Use your scale tool to squish it to be the same width as your plane 3) Skew the image to the correct angle. And simple as that you have your image on the plane you want.

You can do the same on the ground plane by making a square where the height and width are the same as one edge.

To change it back: 1) Draw your image on the square 2) Use the skew tool to tip it over to the side at a 45° angle like shown 3) Use the skew tool again to push it into the correct diamond shape.

These conversions are usually pretty messy and require a bit of cleanup but they let you draw things that would otherwise be very time consuming. You can even use this trick along with other measuring techniques to create cross sections and build complex 3d shapes.

One last stray trick to note is that if you rotate any plane 180 degrees you will get the reversed image, very handy for rotating objects! Unfortunately to rotate by any other angle you’ll have to bust out the skew trick.
With a bit of creative thinking you should be able to use these tips to draw any shape in any orientation in isometric projection. You might even find they help with animation. Though for more complicated things consider booting up your 3d software!
I hope you took something away from this tutorial, if you did please share it with anyone you think it could help. And please take a look around at the rest of my website. This is my first tutorial here but I hope to make more in the future!